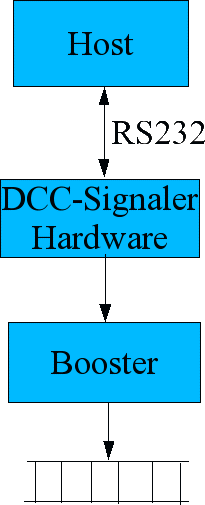
DCC-Signaler hardware
|
The DCC-Signaler hardware is the link to the Booster.
It's job is simple:
The signal-forms generated by the DCC-Signaler host are brougth
on their way to the booster; with exactly timed signals. Therefore the host transmits the bit-pattern and the type of the signal (e.g. NMRA or Motorola) to the hardware. So it's possible to easily implement new commands or correct wrong implemented commands within the host without the need to program a new firmware. The hardware actually only takes over the job of generating the time-critical conversion of the bit-pattern to electrical signals. |
Die DCC-Signaler Hardware stellt die Verbindung zum Booster dar.
Hierbei übernimmt sie die Aufgabe, die durch den DCC-Signaler Host
generierten Signalformen mit exaktem Timing elektrisch auf ihren
Weg zum Booster zu bringen. Hierzu werden vom Host lediglich das Bitmuster des Signals und die Art des Signals (z.B. NMRA oder Motorola) übertragen. Dadurch können neuen Befehle und auch Korrekturen von falsch generierten Befehlen im Host realisiert werden ohne eine neue Firmware einspielen zu müssen. Die Hardware übernimmt also nur die zeitkritische Umsetzung der Signalgenerierung aus Bitmuster in elektrische Signale. |
|
The hardware is not yet in it's final state. Therefore I suggest that you use
a kind of a prototype-technique :)
Testing the modulStart a terminal-application (e.g. minicom on Linux). The parameters for the serial port are 115200BPS,8N1
After entering "DSv" (without " of course) the modul will answer
with it's version-numer (e.g. "V3"). |
Die Hardware ist noch nicht endgültig fertig. Deshalb empfehle ich noch
einen Nachbau in Prototypentechnik :)
Test des ModulsZum Testen ein Terminalprogramm starten (z.B. Minicom unter Linux). Die Parameter der Schnittstelle sind 115200BPS,8N1
Nach der Eingabe von "DSv" (ohne die " natürlich) antwortet das Modul
mit seiner Versionsnummer (z.B. "V3"). |
Schematic/Schaltplan
Roland Weber made a schematic of his DCC-Signaler hardware: signaler_v1.jpgFirmware
Go to the download-section to get the current firmware.Die aktuelle Firmware befindet sich im Download-Bereich.